Just a little donation reminder as Hugo says “Hugo stands on the shoulder of many great open source libraries”, as does many of my tutorials. Brew Hugo
Hugo Getting Started
Checkout the guide at gohugo.io. My guides will always be on a Mac, but I will always try to provide a link for additional operating systems.
Lesson Steps
- Install Hugo
- Create new Hugo site
- Start Using AJonP Template
Lesson 2 (required for Algolia)
Please chekcout Lesson: Hugo Ionic for the next set of features 1. Victor Hugo 1. Deploy
Install Hugo
Brew
If you are like me and just bought a new Mac, you probaly are taking brew for granted and think it is just there right ????! Well first you can head over to brew.sh they will tell you to run
/usr/bin/ruby -e "$(curl -fsSL https://raw.githubusercontent.com/Homebrew/install/master/install)"Hugo
brew install hugoCreate new Hugo site
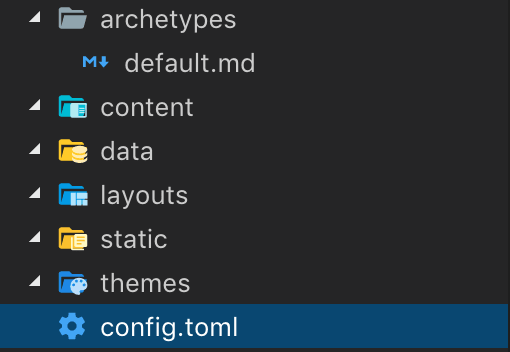
hugo new site 4-hugo-ionic cd 4-hugo-ionicAt this point you will notice that the project remains pretty empty in a generic skeleton.

It only has two files config.toml and archetypes/default.md
If you run
hugo serveright now, you will see a blank screen as there is no content to show.
Index.html
Adding this to the base of our site will be used for setting up the Home Page. This is the only required page you will ever need to build a Hugo based site. Please keep in mind that this is still an html page.
layouts/Index.html
You could make an entire site here if you wanted.Again if you run
hugo serveright now, you will see a blank screen as there is no content to show.
_index.md
content/_index.md
I know this is getting a little frustrating! Again if you run
hugo serveright now, you will see a blank screen as there is no content to show.
Update Index.html
This will be the first page that will show anything in the browser!
layouts/index.html
Now run the command hugo serve and you will see a page that has

Making a Point
Now I wanted to walk you through all of that to show 1. The steps really necessary to make a Hugo site 1. Prove that laying out a site from scratch is time consuming
Start Using AJonP Template
Theme Download Location
You can find the link on Hugo’s Theme site https://themes.gohugo.io/ajonp-hugo-ionic/
Git integraiton
Clone (Easy, not updated)
git clone https://github.com/AJONPLLC/ajonp-hugo-ionic themes/ajonp-hugo-ionicSubmodule (Better, updated)
git submodule add https://github.com/AJONPLLC/ajonp-hugo-ionic themes/ajonp-hugo-ionicAdding the submodule will allow you to receive all of the updates that you want, or lock into a specific commit to run your site from. Then later you are able to run
git submodule update --remote --mergeTheme Benefits
Now you should have a new folder in themes/ajonp-hugo-ionic. This has the full theme including an example site found in themes/ajonp-hugo-ionic/exampleSite
Features
Ionic Theming
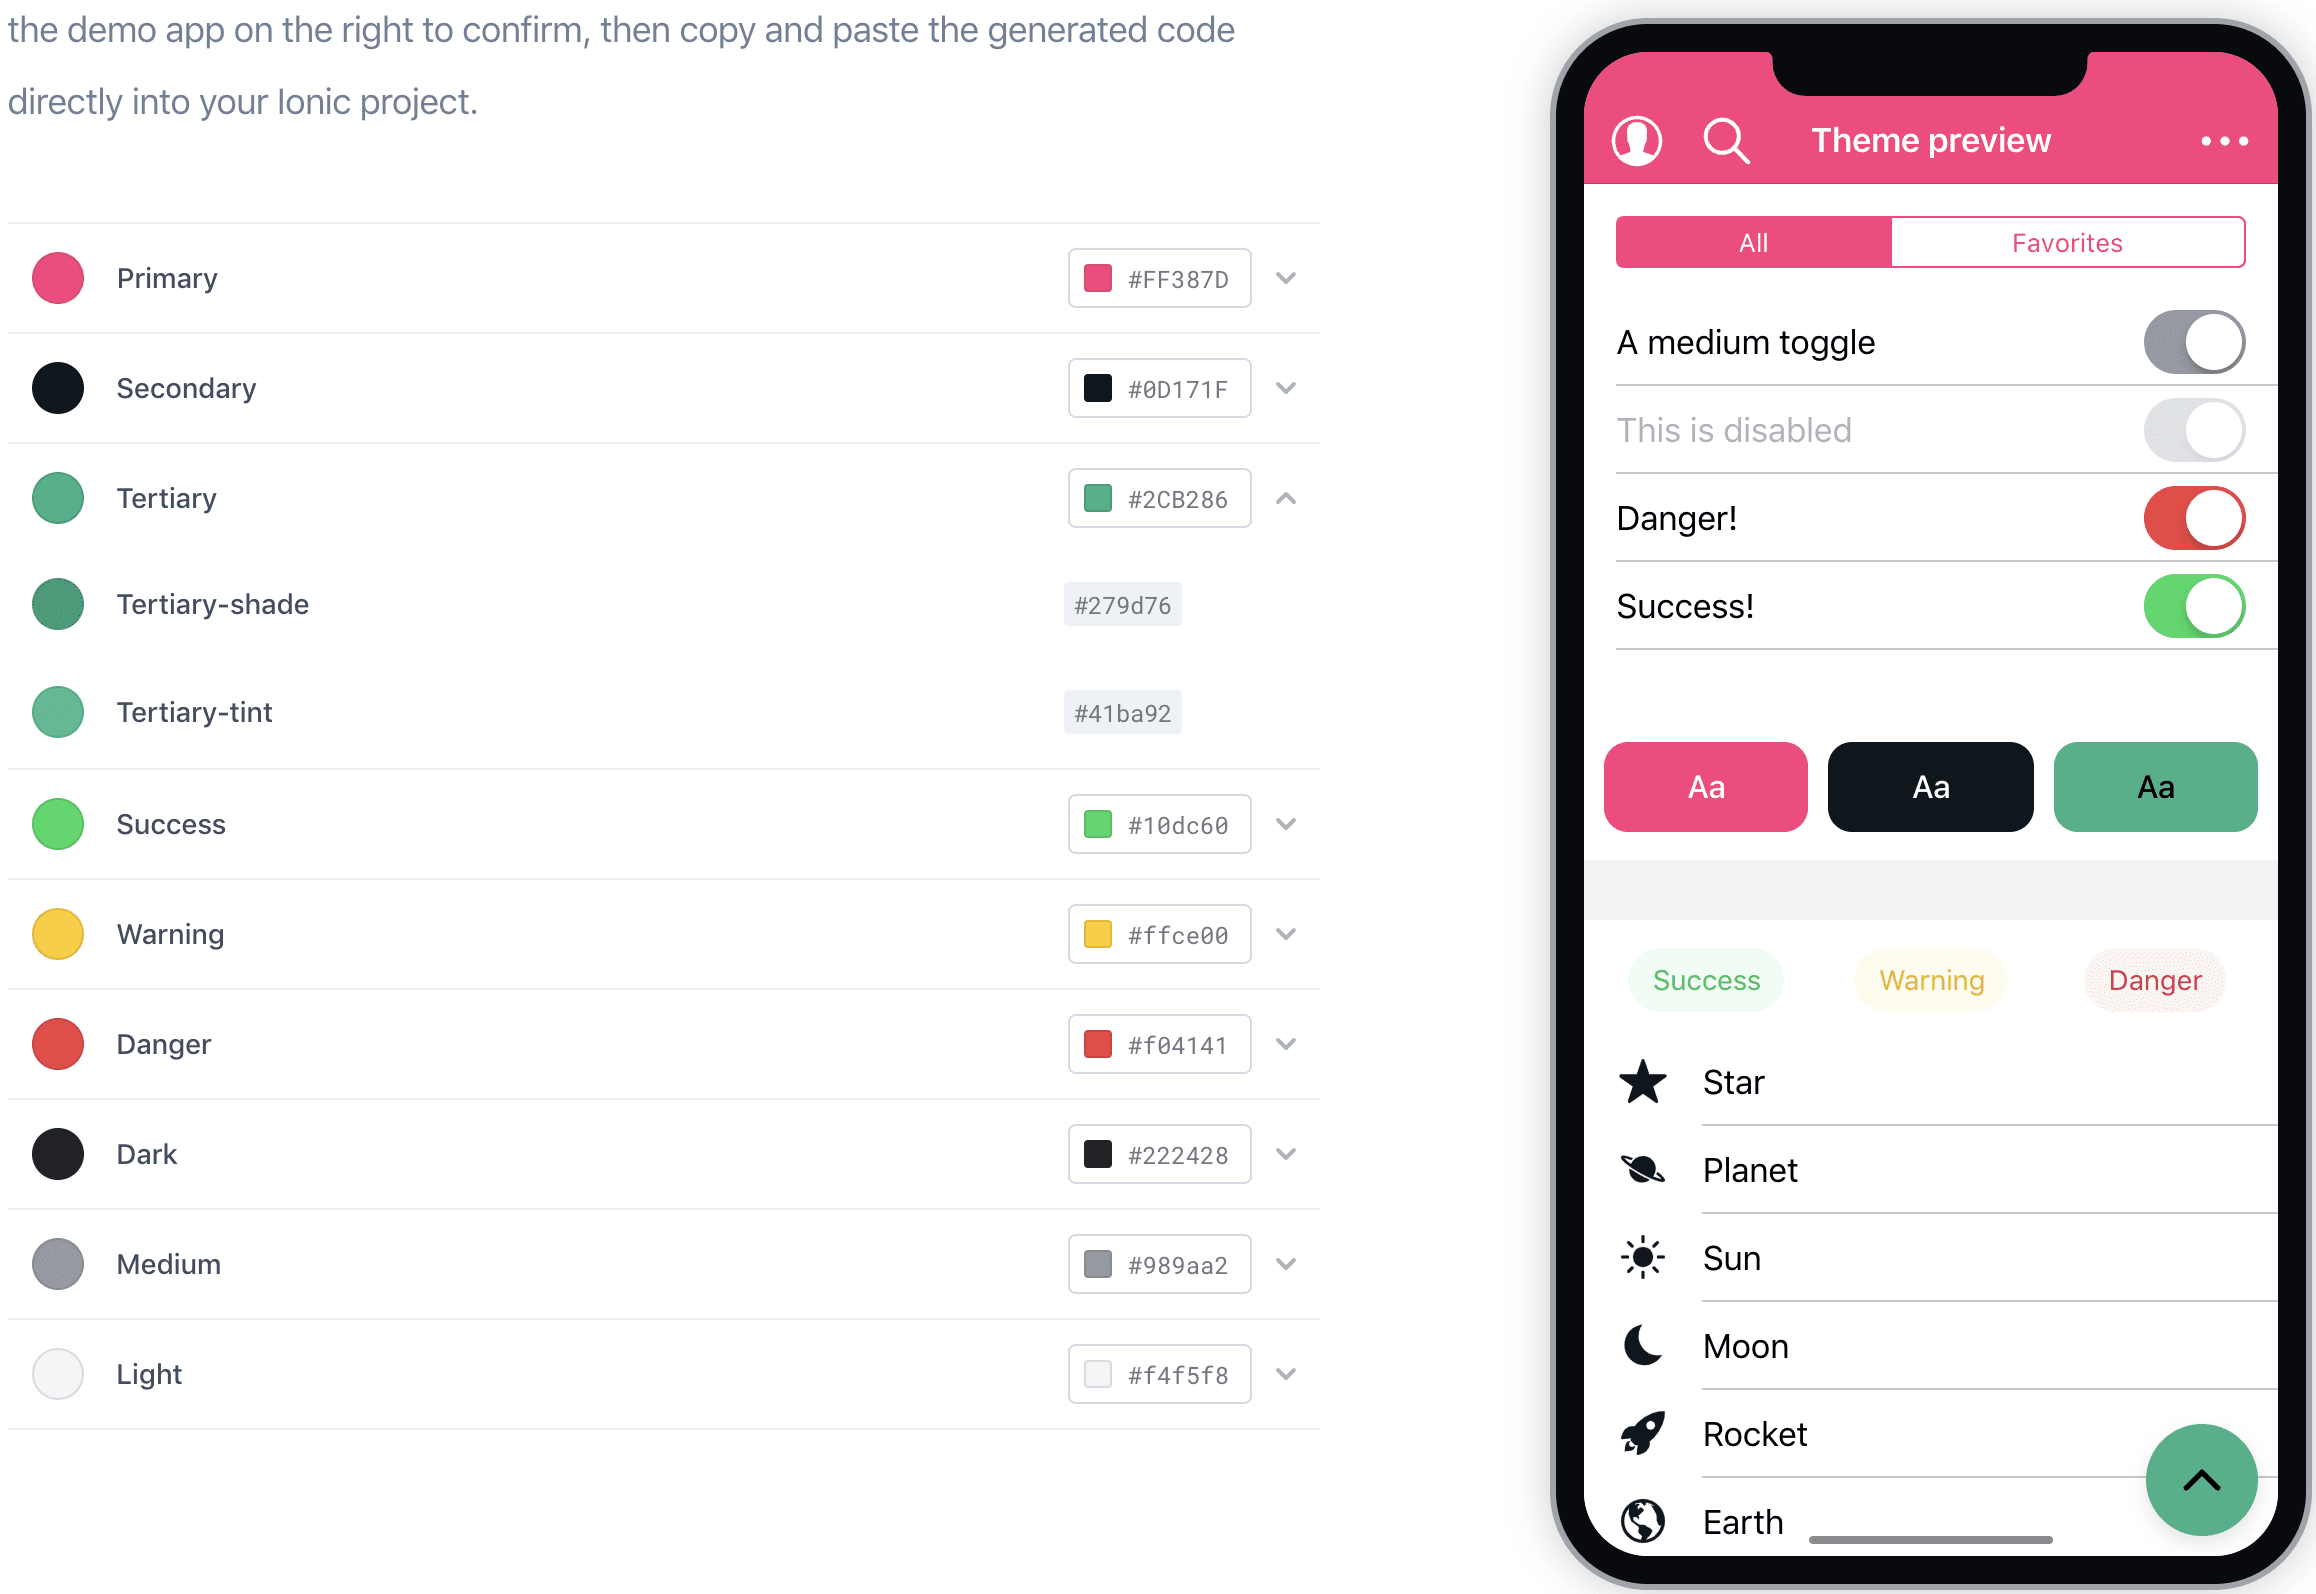
Taking things a step further you can change any of the colors on the site by using Ionic’s Color Generator.
Here is a Hugo inspired look.

Just copy the CSS Variables it produces into static/css/custom.css
:root {
  --ion-color-primary: #ff387d;
  --ion-color-primary-rgb: 255, 56, 125;
  --ion-color-primary-contrast: #ffffff;
  --ion-color-primary-contrast-rgb: 255, 255, 255;
  --ion-color-primary-shade: #e0316e;
  --ion-color-primary-tint: #ff4c8a;
  --ion-color-secondary: #0d171f;
  --ion-color-secondary-rgb: 13, 23, 31;
  --ion-color-secondary-contrast: #ffffff;
  --ion-color-secondary-contrast-rgb: 255, 255, 255;
  --ion-color-secondary-shade: #0b141b;
  --ion-color-secondary-tint: #252e35;
  --ion-color-tertiary: #2cb286;
  --ion-color-tertiary-rgb: 44, 178, 134;
  --ion-color-tertiary-contrast: #000000;
  --ion-color-tertiary-contrast-rgb: 0, 0, 0;
  --ion-color-tertiary-shade: #279d76;
  --ion-color-tertiary-tint: #41ba92;
  --ion-color-success: #10dc60;
  --ion-color-success-rgb: 16, 220, 96;
  --ion-color-success-contrast: #ffffff;
  --ion-color-success-contrast-rgb: 255, 255, 255;
  --ion-color-success-shade: #0ec254;
  --ion-color-success-tint: #28e070;
  --ion-color-warning: #ffce00;
  --ion-color-warning-rgb: 255, 206, 0;
  --ion-color-warning-contrast: #ffffff;
  --ion-color-warning-contrast-rgb: 255, 255, 255;
  --ion-color-warning-shade: #e0b500;
  --ion-color-warning-tint: #ffd31a;
  --ion-color-danger: #f04141;
  --ion-color-danger-rgb: 245, 61, 61;
  --ion-color-danger-contrast: #ffffff;
  --ion-color-danger-contrast-rgb: 255, 255, 255;
  --ion-color-danger-shade: #d33939;
  --ion-color-danger-tint: #f25454;
  --ion-color-dark: #222428;
  --ion-color-dark-rgb: 34, 34, 34;
  --ion-color-dark-contrast: #ffffff;
  --ion-color-dark-contrast-rgb: 255, 255, 255;
  --ion-color-dark-shade: #1e2023;
  --ion-color-dark-tint: #383a3e;
  --ion-color-medium: #989aa2;
  --ion-color-medium-rgb: 152, 154, 162;
  --ion-color-medium-contrast: #ffffff;
  --ion-color-medium-contrast-rgb: 255, 255, 255;
  --ion-color-medium-shade: #86888f;
  --ion-color-medium-tint: #a2a4ab;
  --ion-color-light: #f4f5f8;
  --ion-color-light-rgb: 244, 244, 244;
  --ion-color-light-contrast: #000000;
  --ion-color-light-contrast-rgb: 0, 0, 0;
  --ion-color-light-shade: #d7d8da;
  --ion-color-light-tint: #f5f6f9;
}
Theme updates
I used the theme for AJonP so it may change (you can always stay at a commit), but please contact me or Pull request on Github.